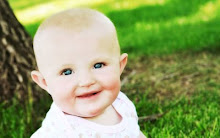
We love art projects!!
It takes time and is sometimes messy, but we do it because I love it and because they love it. It's a nice way to sit down and spend time together. Talking, laughing and working together to accomplish something - builds teamwork and love. This is one of the main ways I feel alive and enjoy my journey as a Mom - for me it's exciting - Something for me to look forward to, something for my girls to look forward to. River always asks what we are going to do when she gets home from school - it helps her get through her day at school by having something to look forward to doing with me. I didn't do crafts for a couple of weeks because I was tired and didn't want to pull things out and clean up messes - I really felt the loss, and so did they. I missed that time to sit down and create together. Now, please don't get down on yourself if you don't enjoy crafts with your kids - I've had lots of people tell me they feel bad that they don't do crafts like I do with my kids - there are other ways to sit down and enjoy time together. Find what you love and they love and do those things with them.
Silver doesn't enjoy crafts as much as River does. She loves coloring, but is still little and is learning to cut paint and glue, so she doesn't quite get into it so much. Our time together is spent mainly in pretend play. That is her way that she loves to spend her mommy time. Wrestling, playing toys, red light green light, playing in the sandbox, swinging on the swings, running around together, and her favorite: playing Dogs!! She LOVES it when I pretend like I'm a dog. She feeds and waters me, we play fetch, and she leads me with a leash. Then she's my puppy and I give her a pretend bath and comb out her fur and play fetch.

Our Art Center.
I just made this for the kids. It has been FABULOUS!!! It is a lazy suzan with the cups all glued down.
The art supplies are always up on the counter. We were always looking for pencils for homework or crayons for art projects. Now they are all handy and accessible, but orderly too. So nice for girls that love to do art many times each day.

Stamps with apples and pears dipped in paint.
This one was done at the Library. Our library has an excellent preschool once a week for an hour that they read stories and always do a craft. So fun!


These were done last fall. It's amazing how much they've changed in a year.


Balloons with flour inside of them. Yarn for hair and draw on a face.


Kids get the biggest kick out of simple things.
Painting rocks!
We had our rocks out in our flower beds and they loved giving them away to friends.
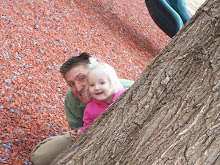
River Silver and Cousin Easton.

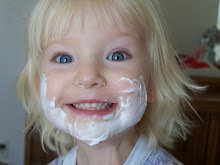
Painting on the bathroom wall with Shaving Cream.

painting from River.

River's canvas.


River's finished painting.

Computer art.

This one was really fun. I took a large roll of paper and put it up covering the whole hall wall. They could then do whatever they wanted on it. This was one section of that large paper. This is River's rendition of us collecting sea shells on the beach. too cute!

Bird flying in the air with a sticker for a beak.
Creative!

Painting balloons.


An art project for school. River needed to put on the t-shirt everything that she loved.
Some of her favorites: Horses, stickers, butterflies, stamps, crayon glue and scisors to represent art projects, puppies, books, reading, cooking and ladybugs. This is River to a T!

Our Science Adventure Canyon Journey Walk!
River painted egg cartons with different colors in each hole and then we walked up the canyon collecting things that fit in the different colors. What a beautiful World God created for us! So colorful and varied. The girls marveled at His goodness and creativity. It was a really special experience to go exploring and talk about The Creation too. This was a GREAT activity!


Wow, I had to do a double take! This is Silver and River in this picture. Summer just wore this purple striped shirt today. Yikes! Time flies. I'll enjoy them small while I can - they are growing SO fast. This was another really neat activity. You sharpen crayons, and place he shavings between wax paper. Put that between a paper shopping bag and iron. It creates a stain-glass window effect that can then be cut into different shapes. I don't have any picture of the finished product - but it was really fun and really cute!

Painting with cars!
Dip the wheels in paint and away you go!


Perler beads - make a design on a pegboard, then cover and iron.
So fun and so creative. River is very patient to make such intricate designs.

I just love this picture!

Stain-glass fish.
You take a plastic sheet - like a sheet protector and either color on the black outline or glue on black paper for your outline. Then glue on squares of tissue paper. Add a coat of glue once it's finished and the light shines through these SO cute!

River LOVES spelling things now and uses many mediums to make letters - clay, twigs, leaves, cherios for Os, etc.

Egg Geodes: A MUST DO!
Very quick very neat science experiment.
We started by making omlets for breakfast - great start to any day :) Wash the shells of the eggs and if you want to keep them around for awhile remove the membrane just inside the shell. Mix 1/4 cup epsom salts with 1/4 cup hot water (hot but not boiling - if salt all disolves, add another spoonfull of salt) Add a drop of food coloring to each egg - you can mix drops of two or more colors to the same shell. Be sure to leave some of them uncolored, the pure crystals were very pretty too.
Put the carton in the fridge for at least 3 hours. There will still be liquid in the shells - carefully pour out into the sink. Be careful not to let the crystals fall out of the shell as you drain them. Each shell should have a mass of needle-shaped crystals inside. As they dry, they will become even more bright and shiny.
You can play with the concentration of the epson salts. Adding more epson salts to the water will give you a denser cluster of crystals, while adding a bit less will give you a better view of the individual crystals. If you used clean egg shells, your crystals should remain bright and shiny for weeks.


I LOVE having this counter for the girls. I can clean, wash dishes, cook and still be right there and available for homework, art projects, lunch, etc.
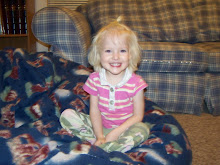
Summer feels like such a BIG girl when she gets to do what her sisters do!

Salt Crystal Garden!
This is the science experiment on Mrs. Stewards liquid bluing - available in the laundry section of the store.
Day 1: Cut up a sponge - place damp pieces in a shallow glass bowl. Over sponge, pour 2T each of Mrs. Stewarts Bluing, salt, water and ammonia.
Day 2: Add 2 T more salt
Day 3: Add 2 T each of Bluing, salt, water and ammonia - avoid pouring on crystal growth.
Repeat day 3 as needed to keep crystals growing.
For color add drops of food coloring or ink to each piece.

The variety of the crystals was fun. Some were like cauliflower and others like little fine needles.


From last Christmas - Big marshmellow in the middle with smaller ones coming out on toothpicks around.


So fabulous! I love all your projects. I will have to get some ideas from you when Judd gets a little bigger. I totally love your art supply center. It's perfect.
ReplyDeleteAhhh! So very great ideas! Thanks for sharing!!
ReplyDelete